The MAEKAN Classroom is a series created by the MAEKAN team to pass on the skills we’ve learned in the past few years. We don’t plan to wait until we have a “masterclass” or spent decades honing our craft to share experience and knowledge that works. We want to help get self-taught creatives started telling and publishing their stories today.
Last time, we looked at story and how to figure out the angle that will guide you through production all the way to publishing. In this second episode, we’re going to get a bit technical by going over a few tools will help you tell your story.

Fundamentals
- If you’re new to working with audio, it can help to treat recording audio like you would photography or videography but instead of images, cameras and lenses, you have sounds, audio recorders, and microphones.
- As with cameras, you really don’t have to have the best equipment to make and tell a great story if you simply learn to make the best of what you have or what you can get. G.A.S — or Gear Acquisition Syndrome — affects creatives of all fields, so don’t let it get you early if you’re just starting out with audio.
- Mediocre equipment used with good recording practices can yield better results than good equipment used with poor practices. With the availability and affordability of quality technology these days, the adage “the best camera is the one in your hands” can apply to sound equipment too.
Setups
At MAEKAN, we accomplish all of our recording needs with three different setups depending on our needs, the situation and the type of equipment.
“No Frills” Setup: A smartphone and an app, sometimes with an external microphone designed for a smartphone. This is also used for instances where we’re having someone record audio remotely and don’t have a means of getting them more advanced equipment.
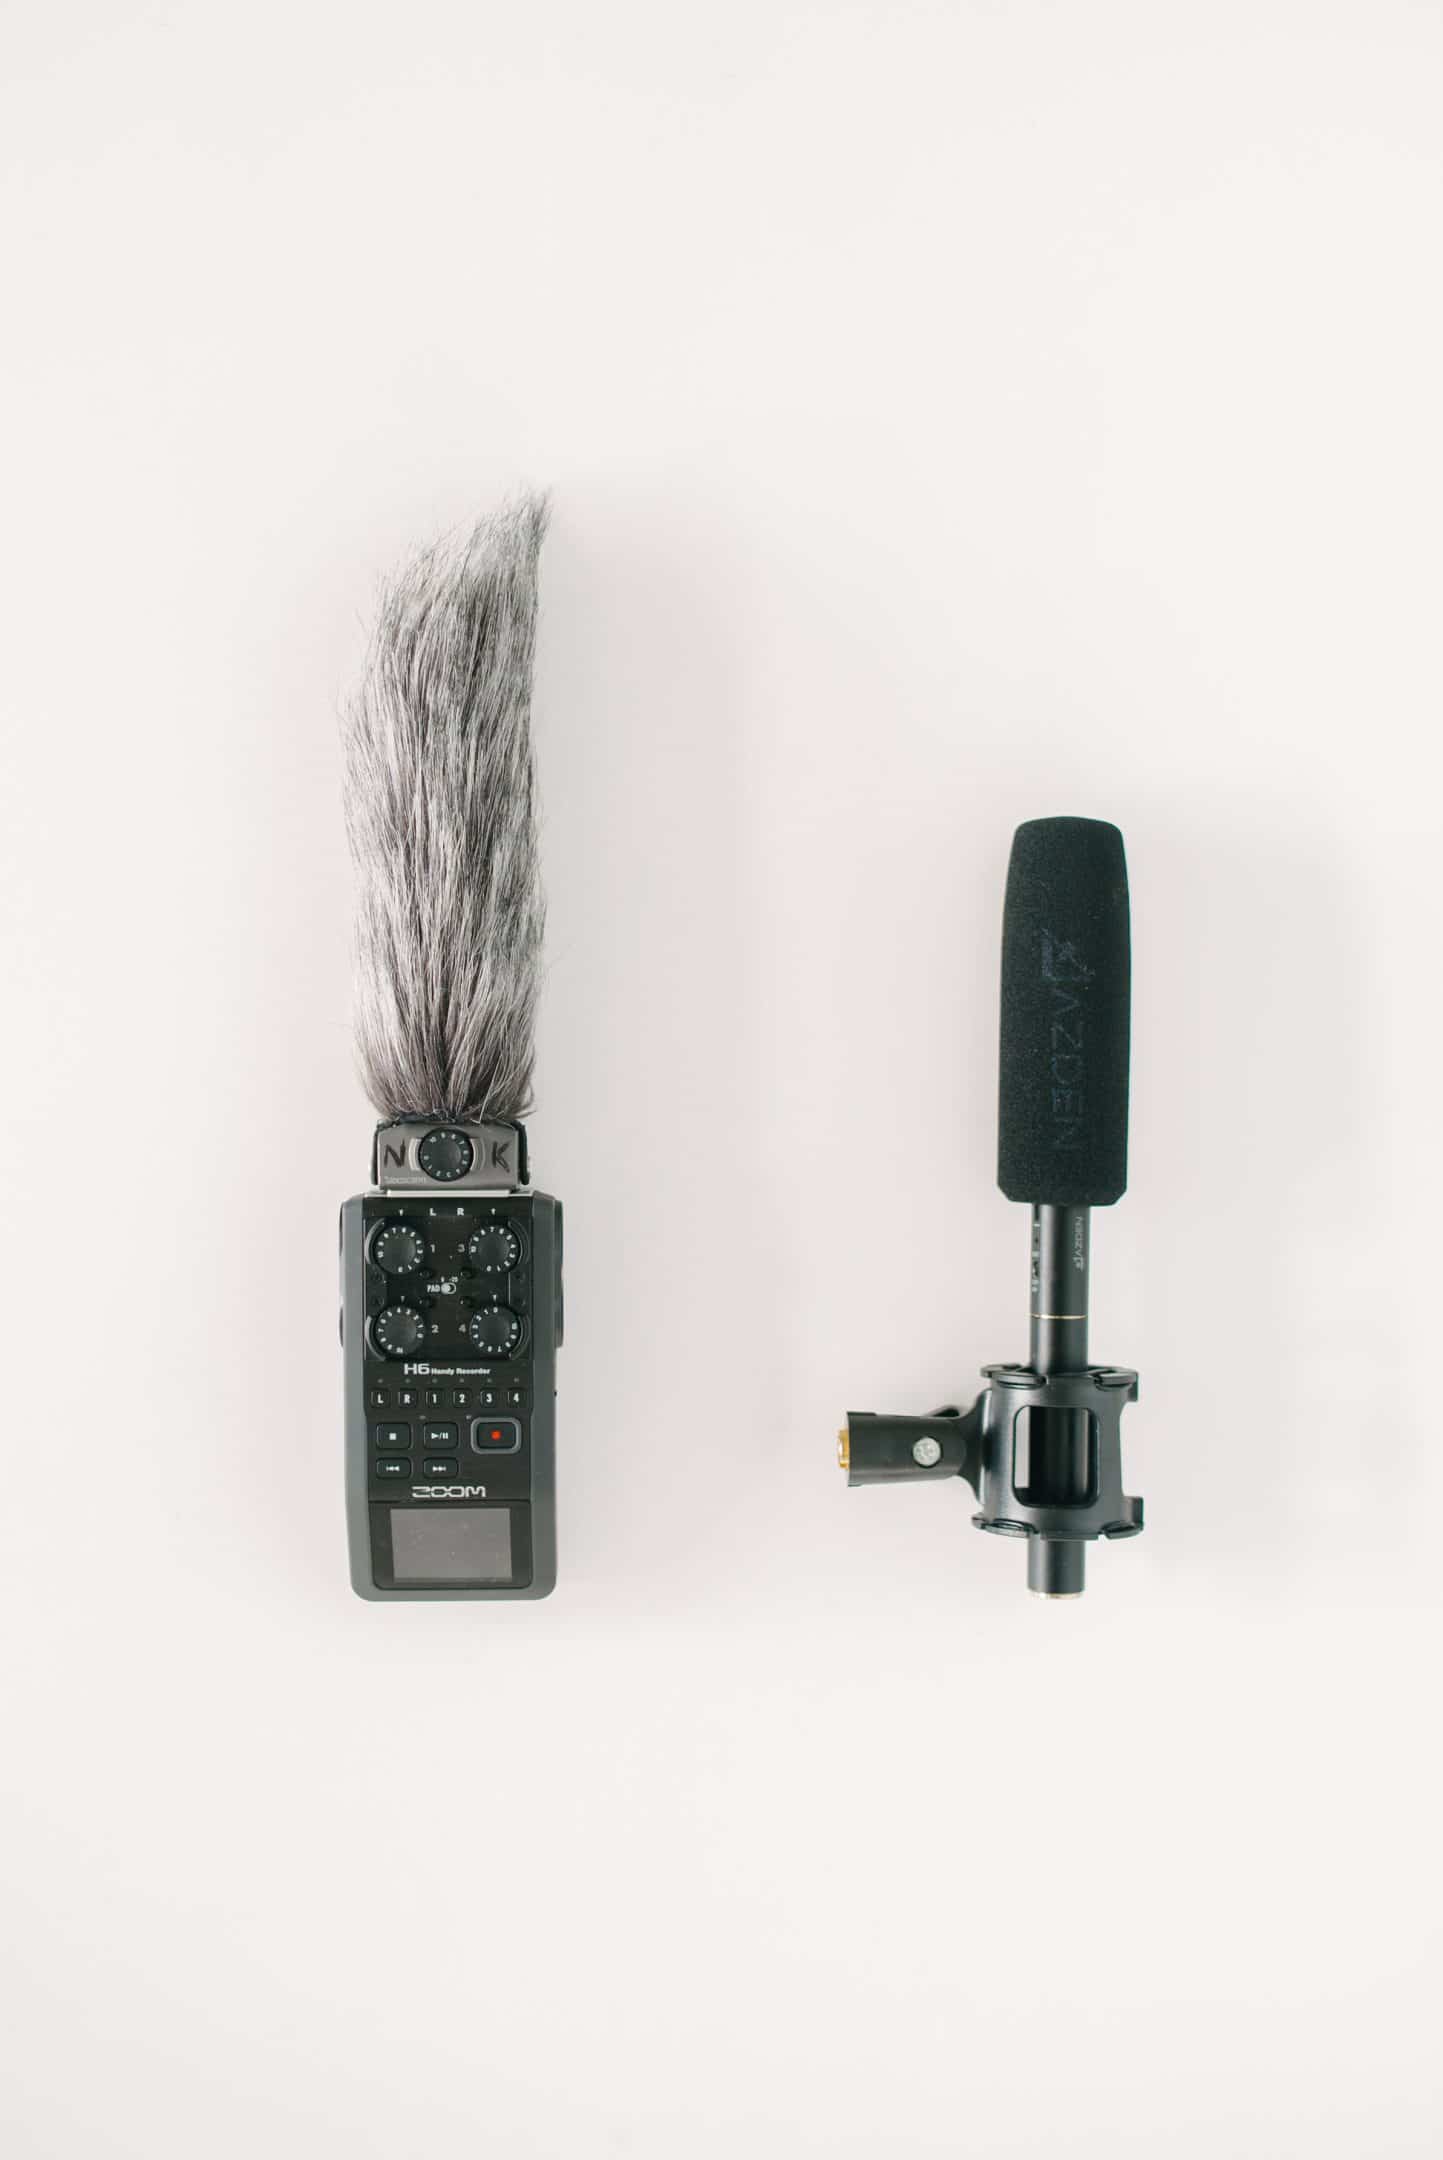
Basic Setup: Our day-to-day recording equipment consists of field recorders like the ZOOM H5 and H6 and either external microphones connected with XLR cables or ZOOM’s interchangeable microphone capsules.
Audio Interface: This studio-centric setup involves using an audio interface, which is essentially a box that translates analog audio signals into digital ones.
For now, in this episode, we’ll be covering the No Frills and Basic setups because they’re the most affordable, versatile and portable.
No Frills Setup
If you’re using your smartphone, you’ll be using your phone’s built-in microphone, whose quality will vary immensely depending on the model. For example, we’ve gotten some pleasant surprises from an iPhone (such as with Taliesin Gilkes-Bower’s narration here) using only the built-in mic. That said, not everyone has an iPhone and if you don’t want to buy or carry any external microphones with you, we recommend at least getting an app to handle your recording and not using the stock one that comes with your phone if you can’t control settings.
In situations where our subject doesn’t have access to equipment or where we can’t send it, we recommend they download the free version of these two apps: Voice Record Pro (iOS) and Easy Voice Recorder Pro (Android).
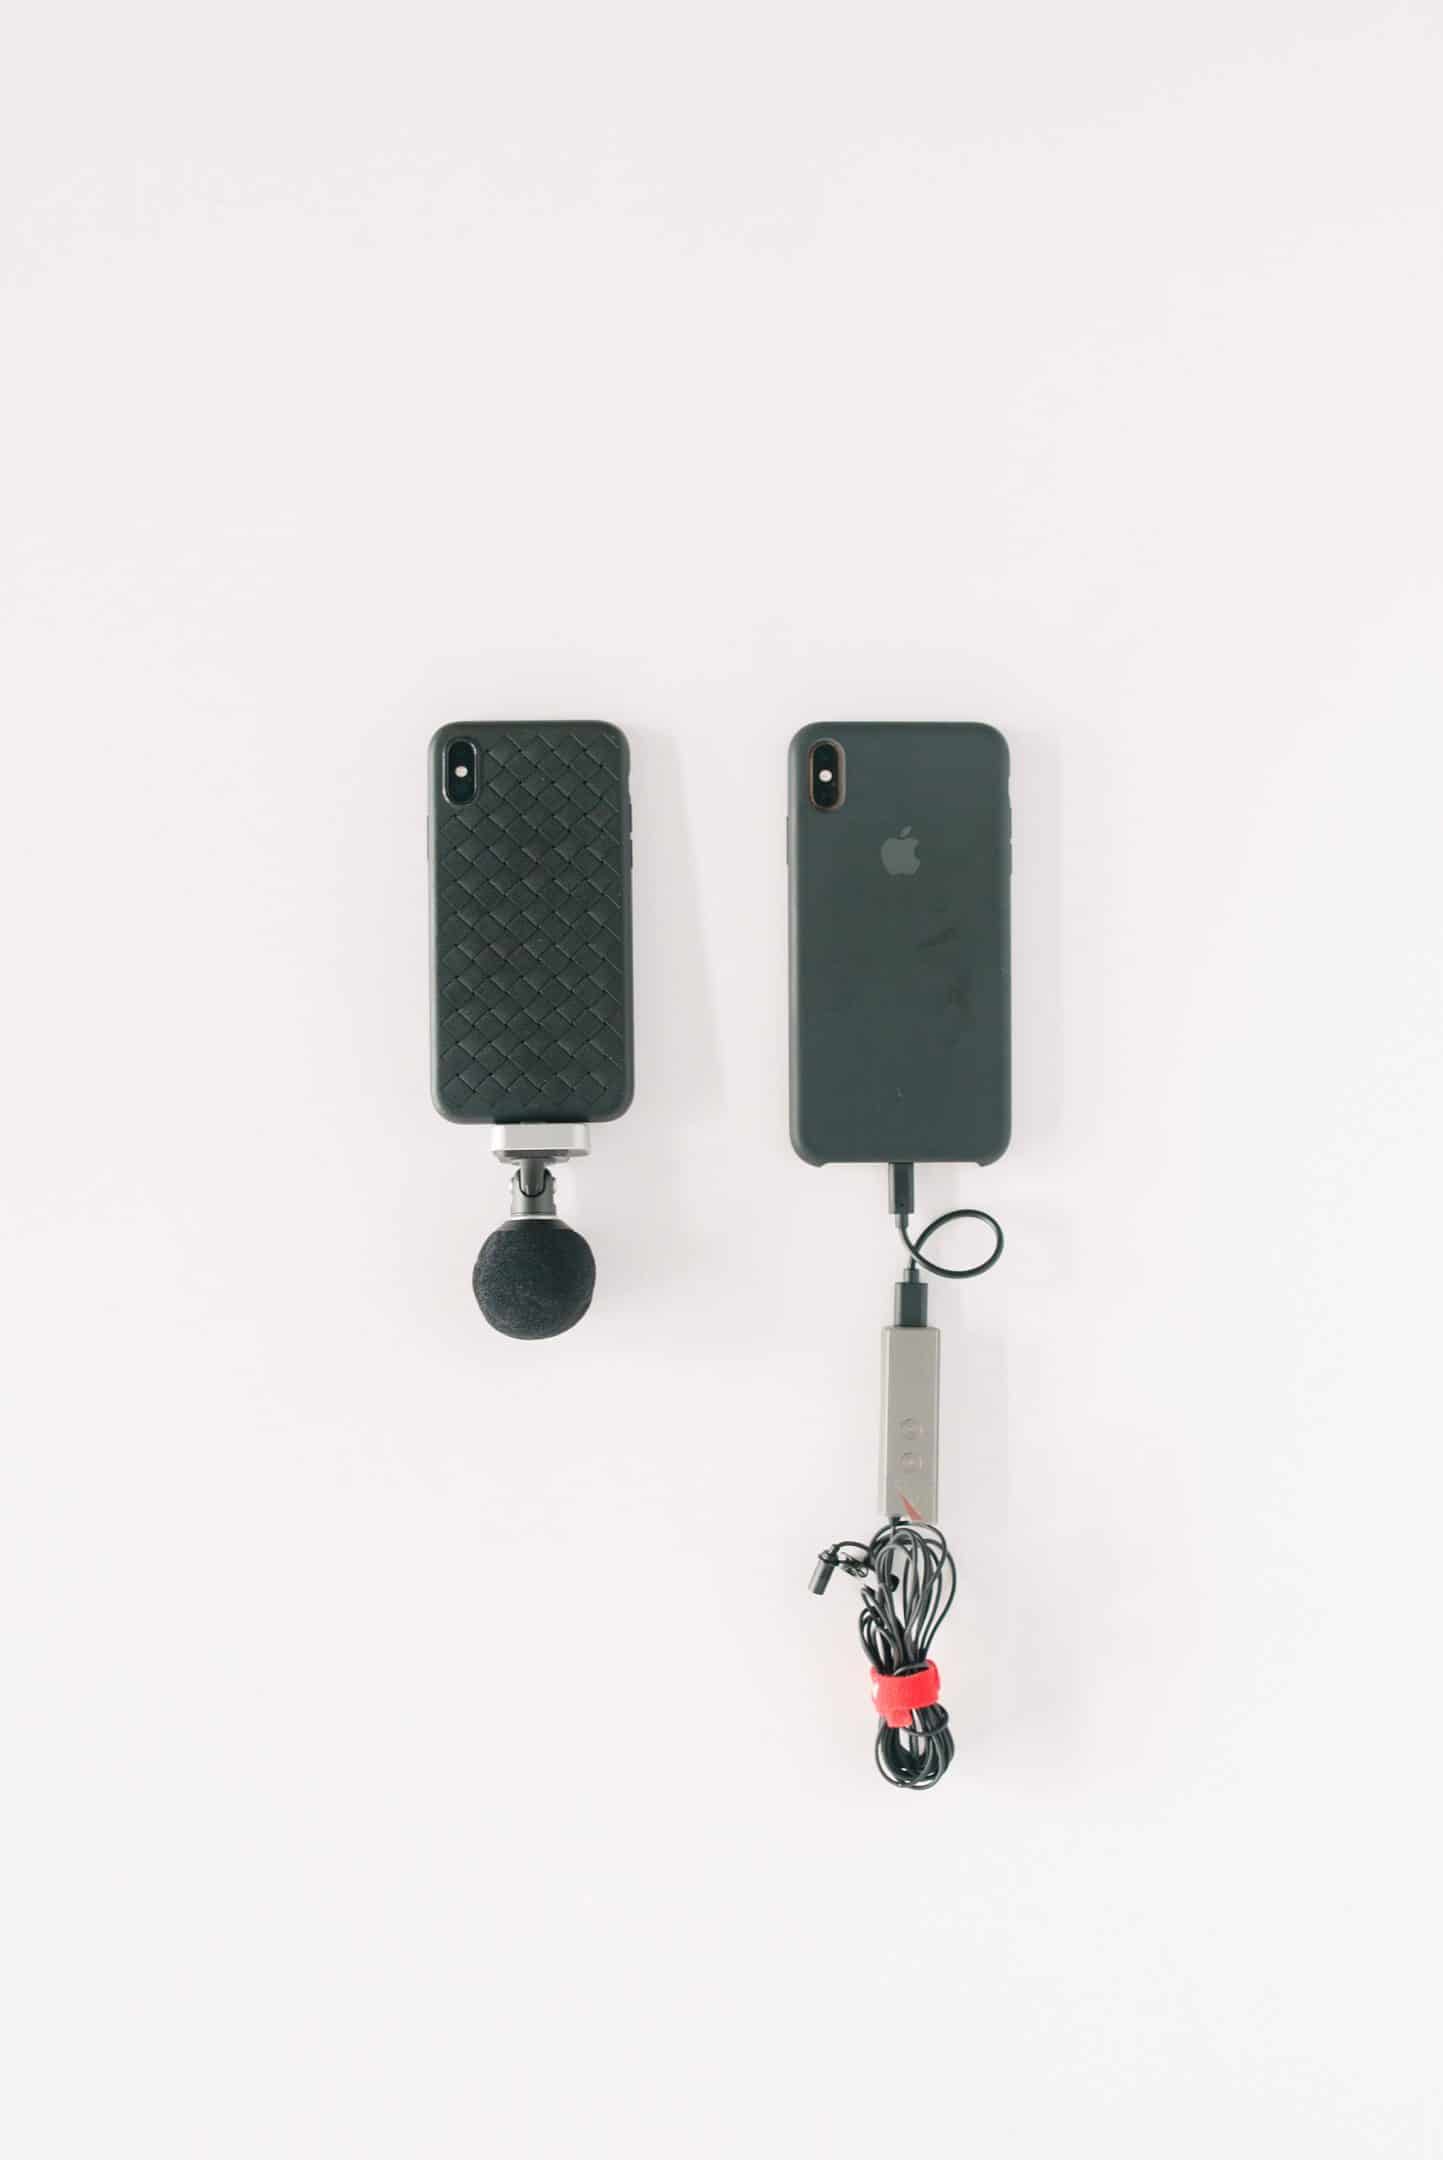
On the left is an external microphone from SHURE. On the right is a Lavalier (LAV) or clip mic from Aputure.
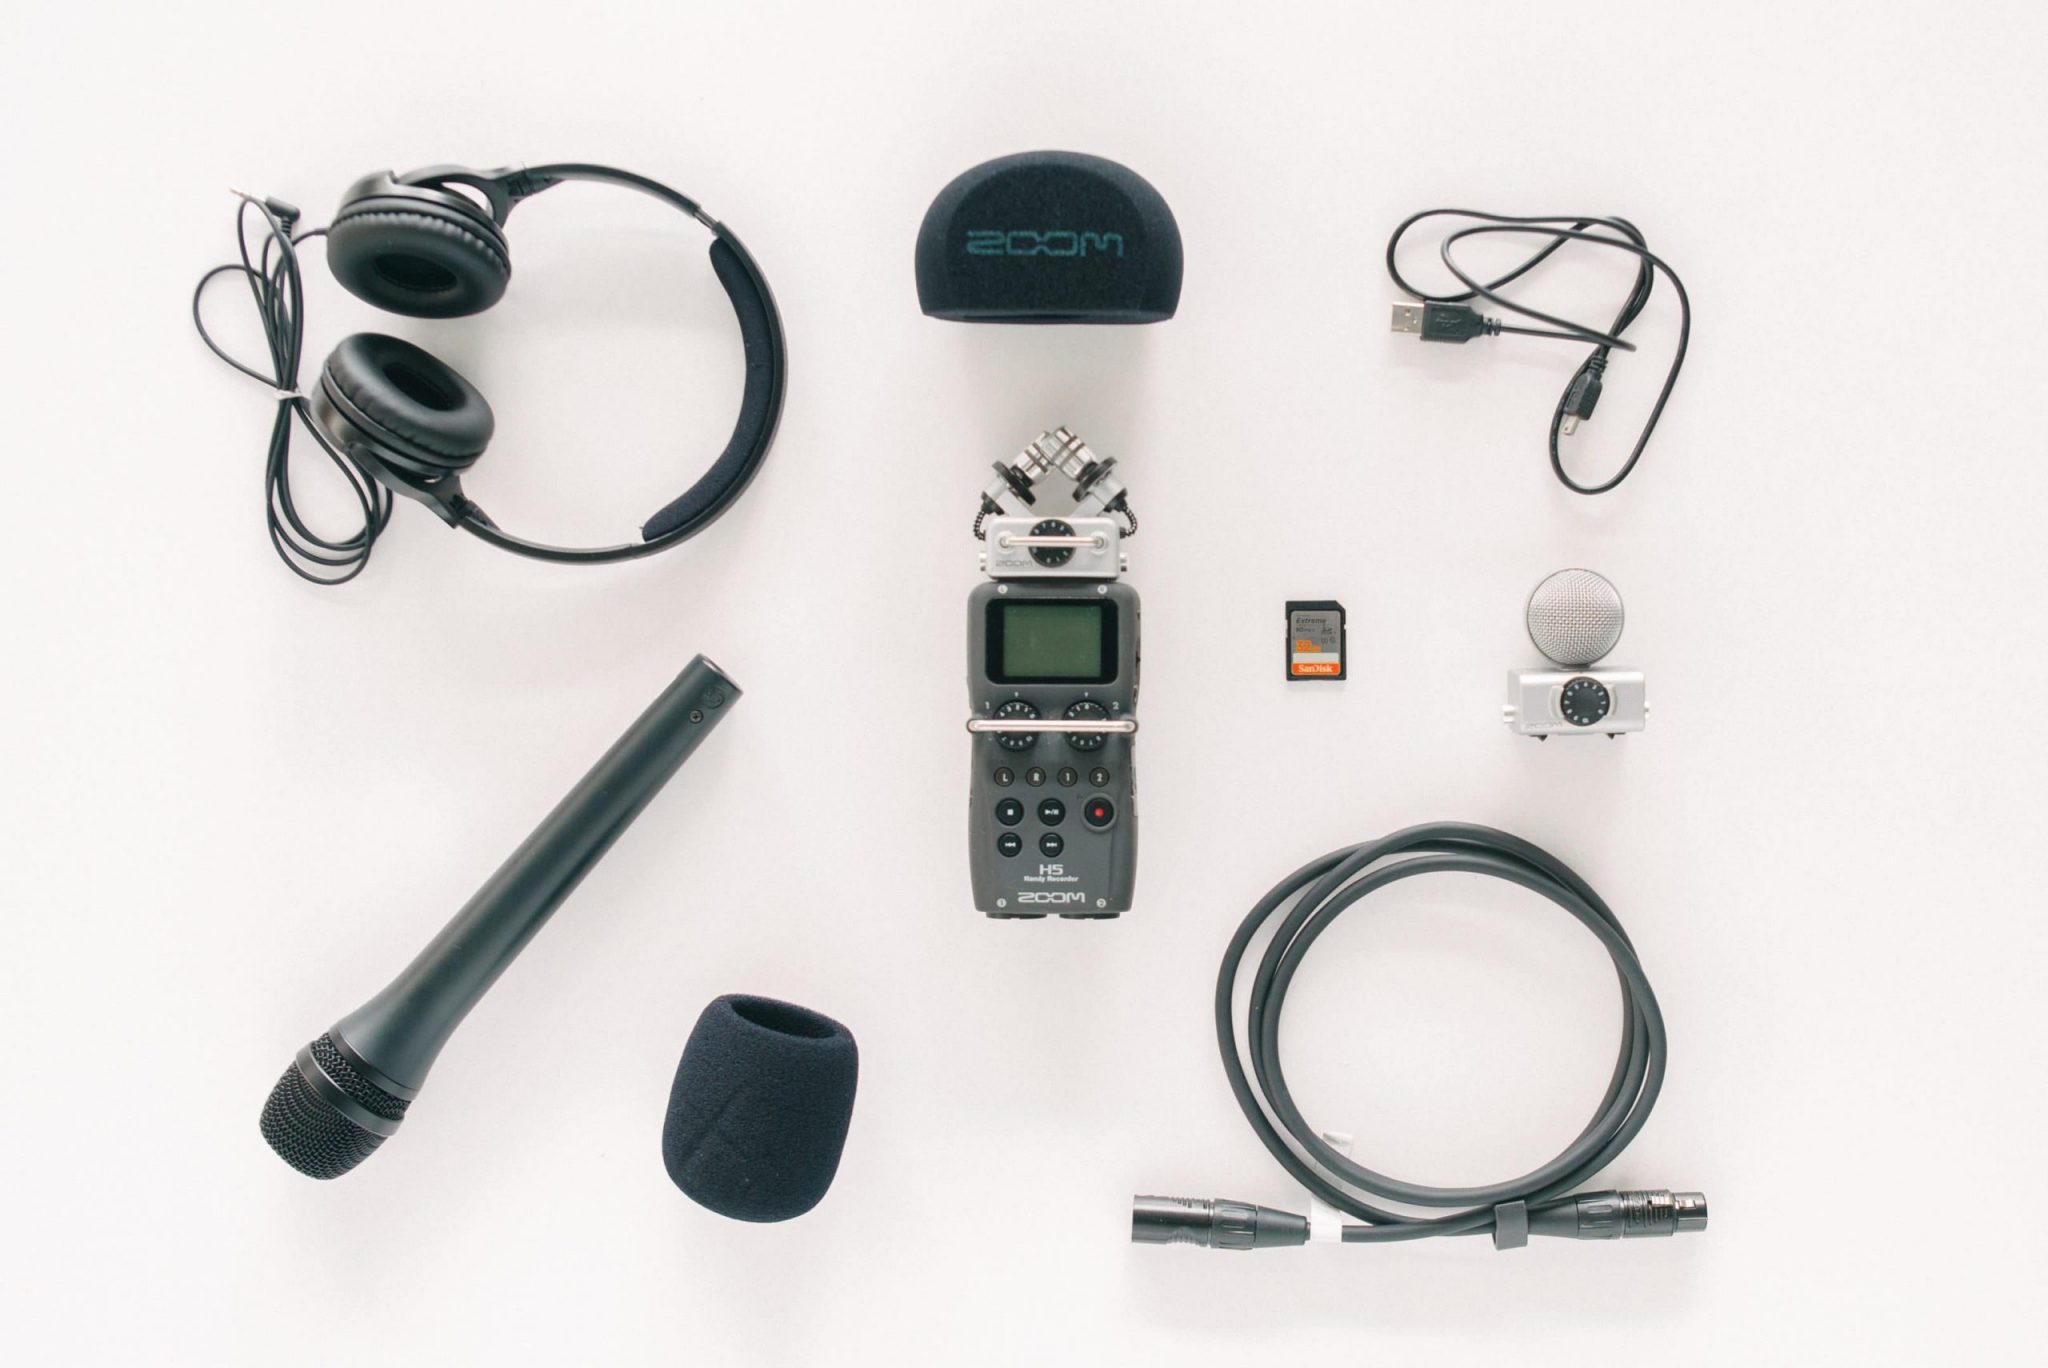
Clockwise from top: Windscreen for ZOOM H5, USB 2.0 cable for computers, Interchangeable mic capsule, Class 10 SD Card, XLR cable for microphones, ZOOM H5 Field Recorder, Windscreen for mic, External Microphone, Headphones for monitoring sound
Basic Setup
You certainly won’t need one if you’re just starting out, but if you choose to buy a field recorder, we recommend the ZOOM H5 because you can get quality recording with it just using the included microphone capsule (at the top of the recorder). What’s more is it’s compact, discreet and relatively affordable compared to their newer models. Bonus: only needs two AA batteries.
And if you decide to upgrade later so that you can record several things at once, you can add up to two external mics connected via XLR cable or you can get ZOOM’s interchangeable microphone capsules which work similar to camera lenses.
One thing to note is to always use headphones when recording dynamic environments or if you’re moving to different locations. Without them, it’s like taking a picture without using the screen or viewfinder.
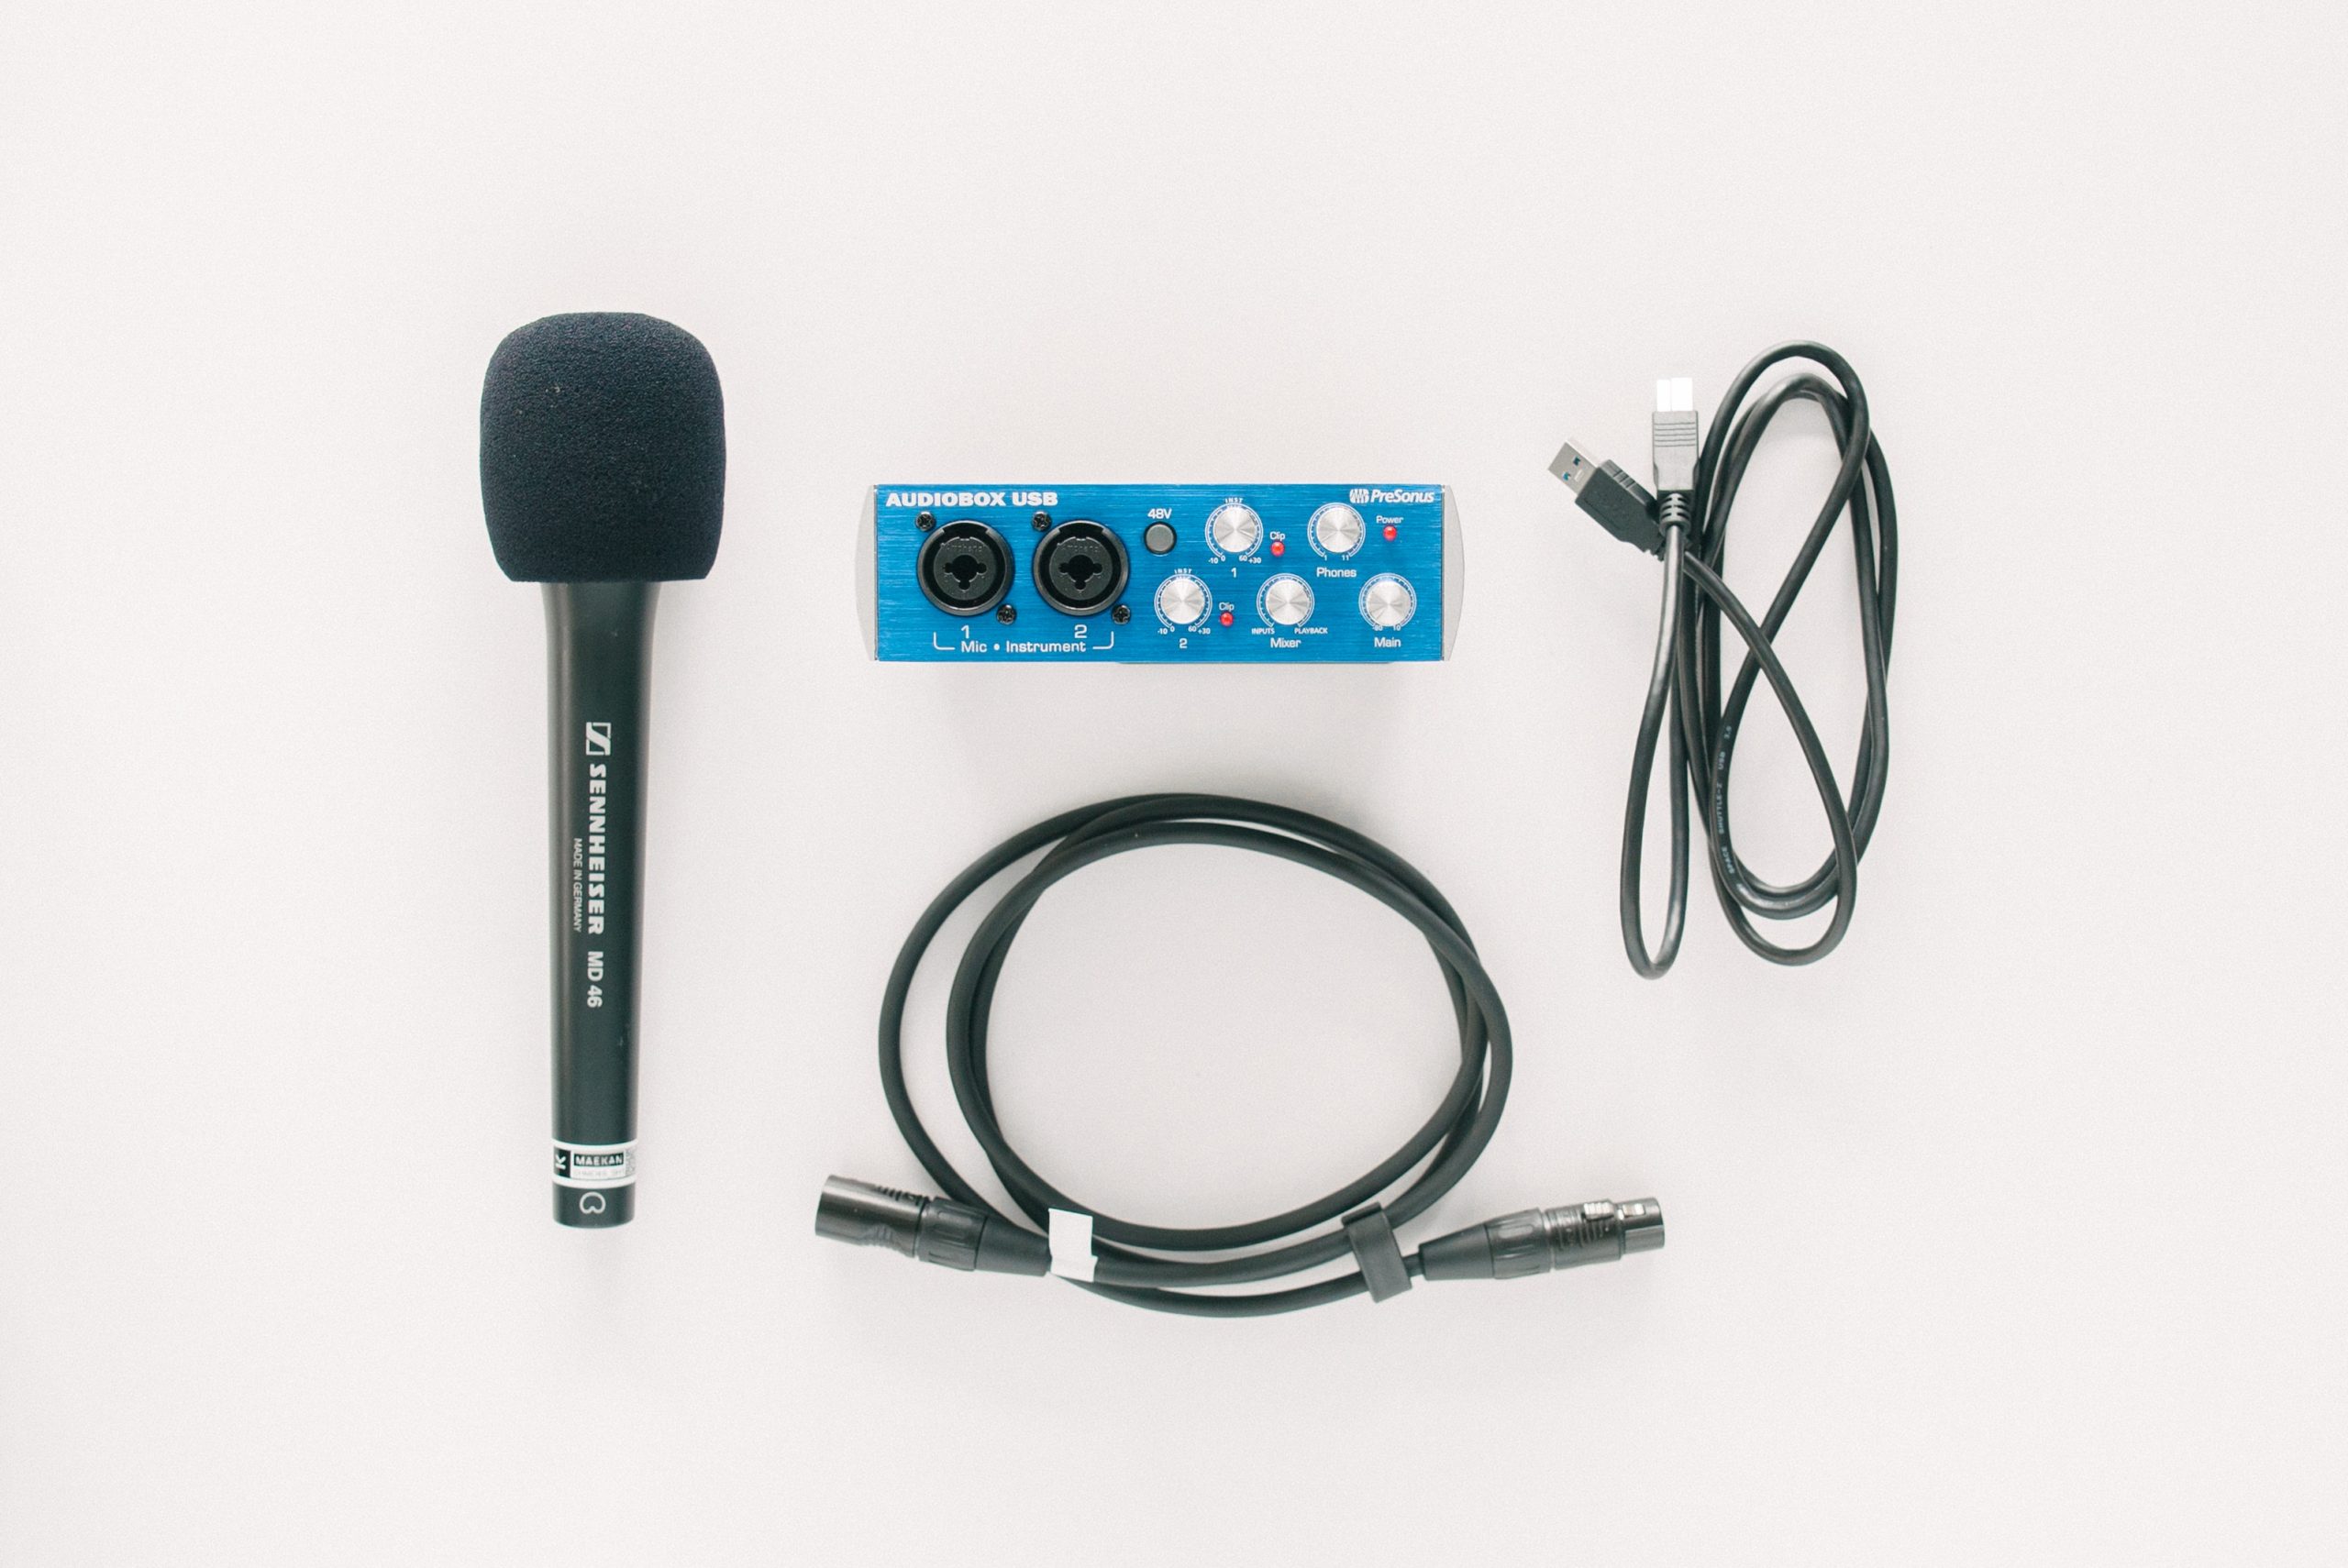
Audio Interface
Generally, your computer sound card isn’t designed to receive audio from an XLR microphone so that’s where the interface comes in.
Once connected to an interface, the microphone signal can feed into a computer via a cable such as USB 3.0. You likely won’t need an audio interface unless you plan to do a lot of recording in a home studio.
That said, one major benefit of an interface is you can seamlessly record audio directly into an editing program like Ableton or Adobe Audition without having to handle files. This saves a lot of time if you have to record a lot of different things and different takes.
Luckily, many dedicated field recorders can connect to a computer via USB and act as an audio interface, something we often do with the ZOOM H5 and H6.
Sound As Image
When you start working with audio, it can be a bit intimidating when you’re used to working only with media that you can see. To make it easier to wrap your head around capturing and editing sound, it helps to think of it like we would images:
- If a camera is the device that captures and stores the images you shoot, you can treat an audio recorder as the device that captures and stores the audio you record.
- Just as a camera can’t shoot images without a lens, a recorder can’t record sound without a microphone.
- You can adjust the recording sensitivity of most audio recording equipment. This setting is called the “gain.” This is sort of equivalent to adjusting ISO (light sensitivity) for a camera sensor.
Regardless of which device or smartphone app you choose, the most important thing you’ll need in an audio recording app is control over a few key settings for when you record.
Microphones
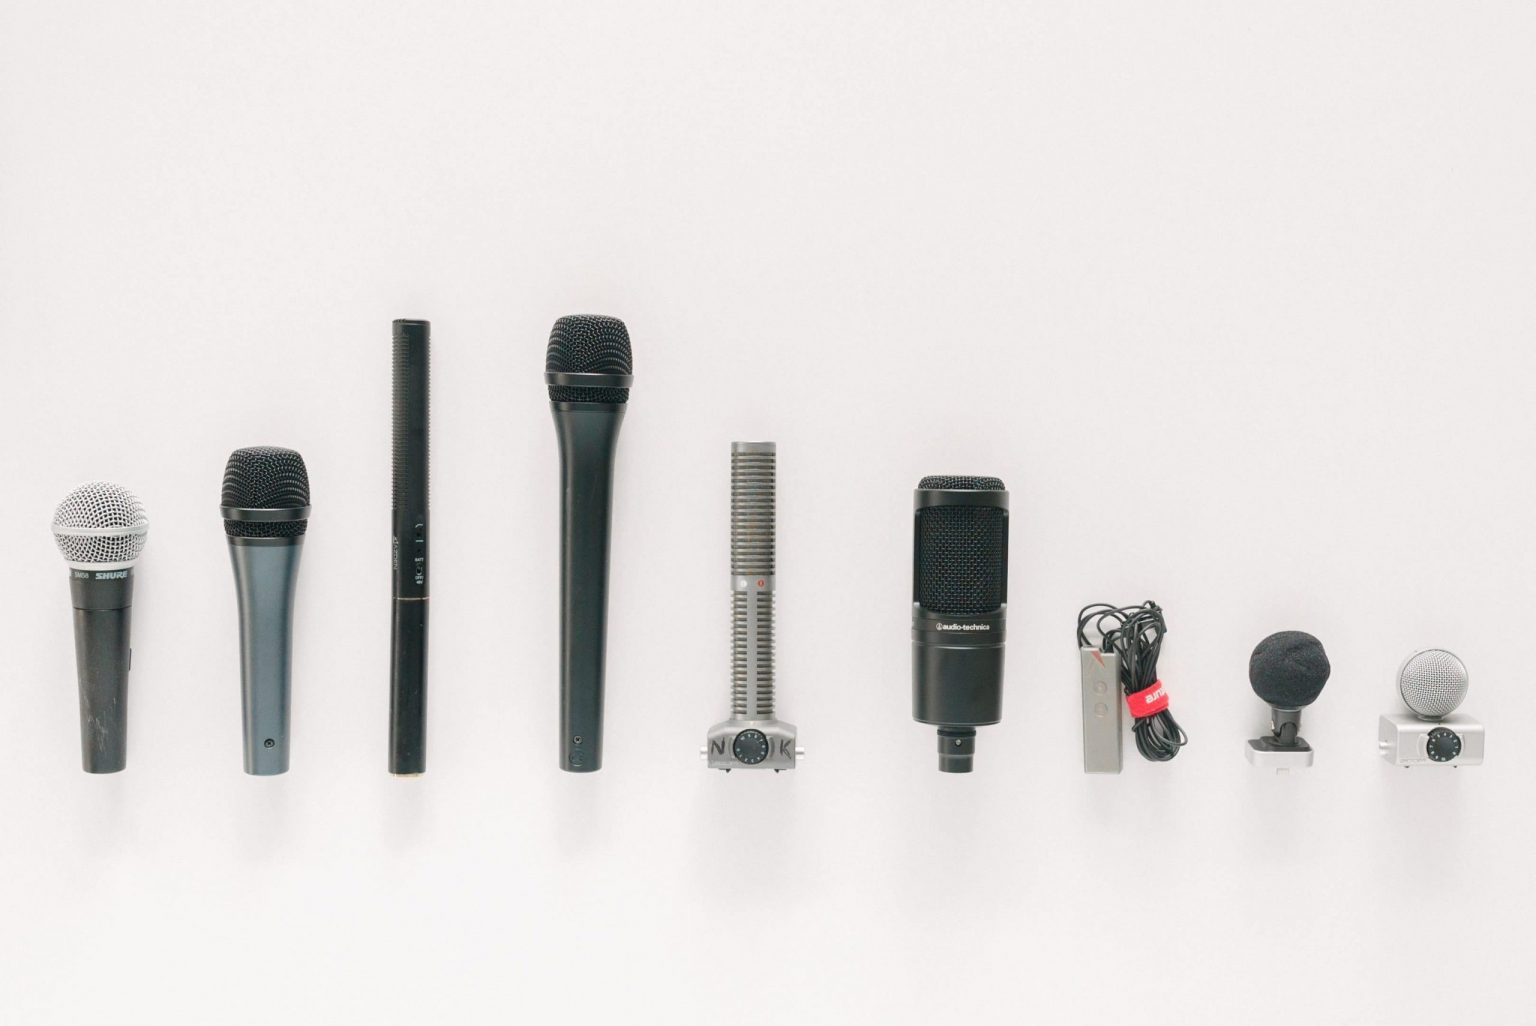
Regardless of what kind of recorder you’re using to capture your sound, if you plan to buy an external mic, it’ll be useful to know what kind of microphones there are and what they do. As with camera lenses, there is a huge variety in microphones that are suited for different purposes.
- Like lenses, microphones can have different capture patterns that record different ranges of the soundscape around it (think of wide versus long lenses) and some are better at isolating sounds from the environment (think shallow depth of field in a lens).
- There are different lenses that suited for capturing big landscapes, 360-degrees around, people or fine details such as a macro lens.
If you’re interested to learn more about some of the microphone types on the market, click here.
Common Microphone Types
Handheld: Whether it’s mounted directly onto your field recorder or attached via a cable, the instantly recognizable handheld mic is as simple as it gets; You just point and record, for the most part.
Shotgun Microphone: Like the handheld mic, the shotgun microphone is connected via an XLR cable to the input jack on a field recorder or interface. It usually comes with a black foam windscreen (pictured) that should be used for most situations, especially outdoors. Shotgun mics are great for isolating sounds and picking them up at a distance, but are susceptible to handling noise (cables or hands rubbing against equipment).
Lavalier Microphone: Also known as a lav mic, lapel mic or clip mic, these microphones are specifically designed to record people speaking hands-free and discretely compared to a handheld mic. For this reason, they might be a better option if you want to shoot photos or video of people talking candidly without any visible equipment (for more on how to install these on your subject, check out [Episode 4: Production]).
If you can only afford to get one type of microphone for a basic setup, a shotgun microphone will accomplish most of your needs because it can pick up the widest range.
There are expensive wireless lavalier systems with both a transmitter and receiver unit, but if you just need a lav mic that can record directly to an iPhone tucked away in a pocket or under a table, consider the affordable Aputure Lyra, which uses the iPhone’s firewire port.
Always Use Protection!
No matter what microphone you choose or what you’re recording, you should use a windscreen especially for outdoors recording or a pop filter if recording voices.
- If you’re only using a smartphone to record with its built-in mic and don’t want to use a different app, we recommend buying (or at least making) a windscreen.
- A windscreen will help reduce the effects of the environment such as heavy winds, but also human speech sounds such as harsh hisses (sh, s and ch sounds and plosives (hard p, t, k sounds).
- In a pinch, even a small sleeve made out of a lower density foam slipped over the bottom of your phone can help dampen loud or sharp noises in your recording.
One particular note for shotgun mics is that they’re handy for isolating and recording distant sounds, but are also prone to handling noise which includes:
- XLR cables rubbing against things
- Thumping sounds made while walking or running
- The sounds of your own fingers popping or rubbing against the mic.
For these reasons, you can consider wearing a glove when handling the shogun mic or putting it into a shock mount, which is designed to dissipate motion and the accompanying noise.
Windscreens (such as the “dead cat” on the left) can help block out harsh noises from both nature and people alike. A windscreen is similar to an ND filter for a camera lens used in sunny conditions.
Key Takeaways
To sum up your equipment needs:
- This episode is not meant to give you GAS (gear acquisition syndrome), but to inform you if and as your recording needs evolve.
- If you’re deciding on using what recorder to use, its like deciding to shoot pictures with your phone for better or worse (a No Frills setup) or upgrading to a dedicated DSLR or mirrorless camera (buying a field recorder).
- Microphones: Omnidirectional, bidirectional and unidirectional refer to the directions where the capture is the strongest. Dynamic mics are rugged, cheaper and handle loud noises while condenser mics are sensitive and more expensive with crisper sound. Shotguns are handheld mics that isolate sounds, even distant ones, while lav mics are clipped to people to record them speaking.
- If you plan to record people’s voices up close or in windy weather, consider buying or making a windscreen.
- No matter what you choose to record with, if your storage allows, try to record within these parameters:
- Format: WAV
- Sample: Rate: 44,000-48,000hz (44-48khz)
- Bit Depth: 24-bit
- Bit Rate: At least 128kbps (kilobits per second).
- Storage: Leave at least 500MB of space per hour of recording at these settings.
In the last section, we focused on the most important aspect of producing original audio content, The Angle. In the next section, we’ll help you prepare before you head into the field or the studio in Part 3: Pre-Production. Stay tuned!
All Sections
Part 6 — Publishing & Promotion
If you have any questions or feedback on this episode or series, drop us a line at info@maekan.com.


